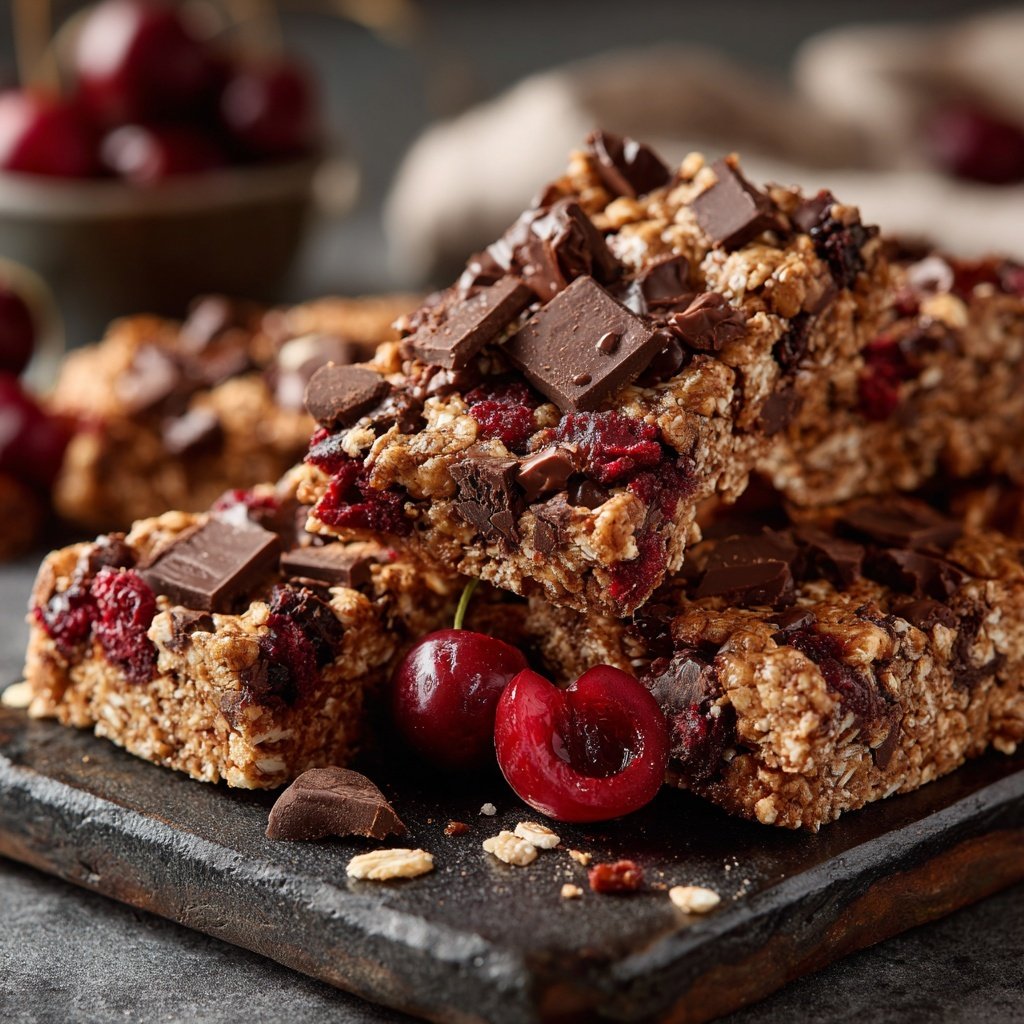
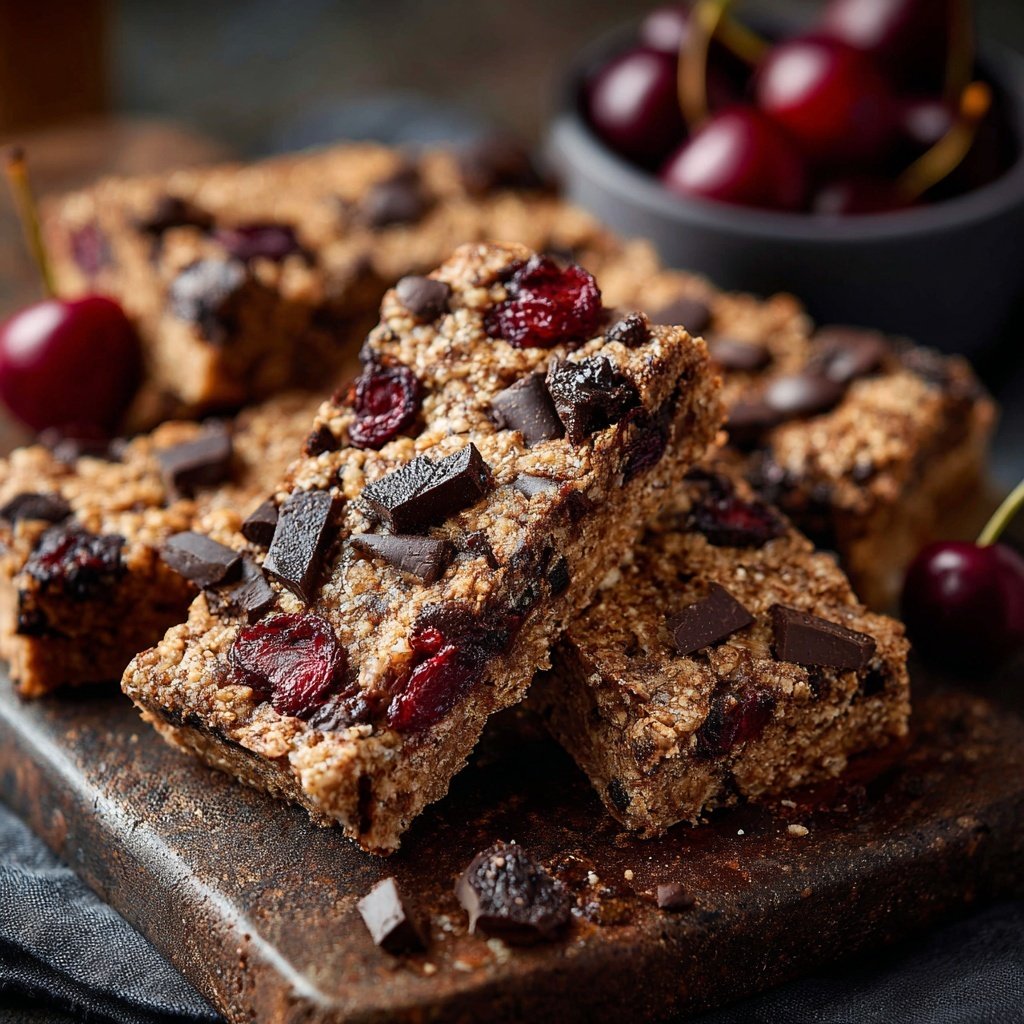
Chocolate Cherry Snack Bars
Highlighted under: Classic Meals
I absolutely love these Chocolate Cherry Snack Bars because they bring together the rich sweetness of chocolate and the tartness of cherries in one delicious bite. After many experiments, I found the perfect combination of ingredients that not only enhances the flavor but also keeps the bars chewy and satisfying. These bars make for an excellent snack or an indulgent dessert, and they are surprisingly easy to prepare. You're going to want to keep this recipe on hand!
During my quest to create the perfect snack bar, I discovered that combining dark chocolate with dried cherries adds a delightful contrast of flavors. To achieve the ideal texture, I decided to mix oats and almond butter as the base, which brings a nutty flavor and a chewy consistency that pairs beautifully with the chocolate and cherries.
After trying several methods, I learned that lightly toasting the oats before adding them to the mixture enhances their flavor significantly. This small step resulted in a deeper, nuttier taste that elevates the entire creation. Trust me, you won’t regret taking that extra time!
Why You'll Love This Recipe
- The perfect combination of sweet chocolate and tart cherries
- Nutty, chewy texture that's satisfying and wholesome
- Easily customizable with other nuts or dried fruits
Understanding the Key Ingredients
The combination of rolled oats and almond butter forms the base of these Chocolate Cherry Snack Bars, providing not just structure but also a hearty, chewy texture. Rolled oats are key here; their ability to absorb moisture from the other ingredients keeps the bars from becoming too crumbly. Almond butter adds a nutty flavor and healthy fats, which help to bind everything together while contributing to the overall richness of the bars.
Honey or maple syrup is the sweetener of choice in this recipe and serves a dual purpose. Not only does it add sweetness, but it also plays a critical role in moisture retention, ensuring the bars remain chewy rather than dry. If you prefer a sugar-free option, consider using agave syrup or a date paste, but be aware that these may alter the flavor and texture a bit.
Tips for Perfecting Your Bars
To achieve optimal texture, make sure to toast your rolled oats before mixing them into the batter. Toasting enhances their flavor and ensures they provide a nice crunch. Keep an eye on them in the oven, as they can go from golden to burnt very quickly—about 10 minutes at 350°F is usually just right, but adjust based on your oven's performance.
Pressing the mixture firmly into the pan is vital for achieving a well-formed bar that holds together nicely. You can use a flat spatula or even the bottom of a measuring cup to ensure even pressure. If the mixture feels too crumbly when you're trying to press it down, consider adding a little more almond butter or sweetener to help bind it all together.
Ingredients
Gather these delicious ingredients to make your Chocolate Cherry Snack Bars:
Ingredients
- 1 cup rolled oats
- 1/2 cup almond butter
- 1/2 cup honey or maple syrup
- 1/2 cup dark chocolate chips
- 1/2 cup dried cherries, chopped
- 1/4 cup sliced almonds
- 1 teaspoon vanilla extract
- 1/2 teaspoon salt
With these ingredients, you're all set to create a tasty snack!
Instructions
Follow these straightforward steps to prepare your bars:
Preheat the Oven
Preheat your oven to 350°F (175°C) and line an 8x8-inch baking pan with parchment paper.
Toast the Oats
Spread the rolled oats on a baking sheet and toast in the oven for about 10 minutes until lightly golden.
Mix the Ingredients
In a large bowl, combine the toasted oats, almond butter, honey (or maple syrup), vanilla extract, salt, dark chocolate chips, dried cherries, and sliced almonds. Stir until well combined.
Transfer to the Pan
Pour the mixture into the prepared baking pan and press it down firmly to create an even layer.
Bake
Bake in the preheated oven for about 20 minutes or until the edges are slightly golden.
Cool and Cut
Allow the mixture to cool completely in the pan before lifting it out using the parchment paper. Cut into bars and enjoy!
Enjoy your Chocolate Cherry Snack Bars as a delicious treat!
Pro Tips
- For added flavor, you can sprinkle some sea salt on top before baking or substitute with your favorite nut butter.
Make-Ahead and Storage Tips
These Chocolate Cherry Snack Bars store incredibly well, making them perfect for meal prep. Once cooled, simply cut them into bars and place them in an airtight container. They'll keep at room temperature for up to a week or can be refrigerated for up to two weeks, though refrigeration may alter their texture slightly. For longer storage, consider freezing the bars; they can last up to three months in the freezer. Just be sure to individually wrap each bar in plastic wrap before freezing to maintain freshness.
When you’re ready to enjoy them after freezing, remove the bars from the freezer and let them thaw at room temperature for about 30 minutes before serving. This way, they regain their chewy texture and flavor. They can also be enjoyed straight from the freezer if you love a cold snack!
Variations and Customization Ideas
While this recipe highlights the combination of chocolate and cherry, there are numerous ways to customize it to suit your taste preferences. Consider swapping the dried cherries for other dried fruits like cranberries, apricots, or even dried figs for a different flavor profile. Similarly, feel free to mix in other nuts or seeds, such as walnuts, pistachios, or pumpkin seeds, which not only add variety in flavor but also enhance the nutrition of your bars.
If you want to elevate the chocolate flavor, substitute some or all of the dark chocolate chips with cocoa nibs for a more intense chocolate experience. Alternatively, you could experiment with flavors like peanut butter instead of almond butter, or even add spices like cinnamon or nutmeg for a warm undertone. Just remember that any substitutions might slightly alter the texture and flavor balance, so keep that in mind as you experiment.
Questions About Recipes
→ Can I use other types of nuts?
Absolutely! Feel free to substitute with walnuts, pecans, or even cashews.
→ How should I store these snack bars?
Store them in an airtight container at room temperature for up to a week, or refrigerate for longer freshness.
→ Can I make these bars vegan?
Yes! Just use maple syrup instead of honey and ensure your chocolate chips are dairy-free.
→ What if I don't have almond butter?
You can use any nut or seed butter you prefer, such as peanut butter or sunflower seed butter.
Chocolate Cherry Snack Bars
What You'll Need
Ingredients
- 1 cup rolled oats
- 1/2 cup almond butter
- 1/2 cup honey or maple syrup
- 1/2 cup dark chocolate chips
- 1/2 cup dried cherries, chopped
- 1/4 cup sliced almonds
- 1 teaspoon vanilla extract
- 1/2 teaspoon salt
How-To Steps
Preheat your oven to 350°F (175°C) and line an 8x8-inch baking pan with parchment paper.
Spread the rolled oats on a baking sheet and toast in the oven for about 10 minutes until lightly golden.
In a large bowl, combine the toasted oats, almond butter, honey (or maple syrup), vanilla extract, salt, dark chocolate chips, dried cherries, and sliced almonds. Stir until well combined.
Pour the mixture into the prepared baking pan and press it down firmly to create an even layer.
Bake in the preheated oven for about 20 minutes or until the edges are slightly golden.
Allow the mixture to cool completely in the pan before lifting it out using the parchment paper. Cut into bars and enjoy!
Extra Tips
- For added flavor, you can sprinkle some sea salt on top before baking or substitute with your favorite nut butter.
Nutritional Breakdown (Per Serving)
- Calories: 210 kcal
- Total Fat: 12g
- Saturated Fat: 2g
- Cholesterol: 0mg
- Sodium: 95mg
- Total Carbohydrates: 22g
- Dietary Fiber: 3g
- Sugars: 10g
- Protein: 4g